Disk Management
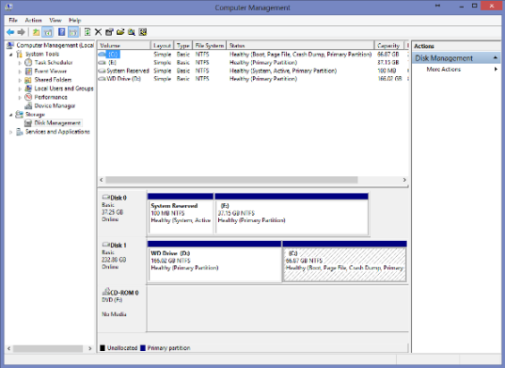
Disk Management is a utility built into Windows XP, Vista, Windows 7 and Windows 8 which can be used to create, delete, and format partitions.
<-- -->
Disk Management is a utility built into Windows XP, Vista, Windows 7 and Windows 8 which can be used to create, delete, and format partitions.
<-- -->
Select an Operating System (OS)
| ||||
| Windows XP | Click Here for Instructions (instructions will appear below this table) | |||
| Windows Vista / Windows 7 | Click Here for Instructions (instructions will appear below this table) | |||
| Windows 8 | Click Here for Instructions (instructions will appear below this table) | |||
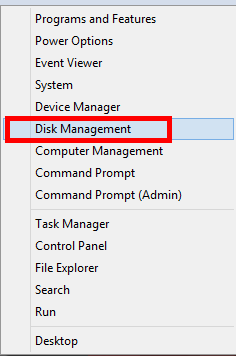
For Windows 8:
- From the Desktop, bring the mouse to the lower left-hand corner of the screen. This will bring up a small Start menu preview screen.
- Right click with the mouse, and a list if options will appear.
- From this list, click on Disk Management, which will launch the window on the Dekstop.
 | |
| Note: Disk Management can also be used to view partitions and their formatted file systems on the hard drive. | |

 A Java application must have the extension .java - this is a language rule. Upon compiling, it gets converted to a class file also known as bytecode. The JVM executes the class file using the